Trustworthy Drywall Installation Solutions for each Area
Total Overview to Effective and Reliable Drywall Setup
Drywall installment is an essential component of any kind of building or improvement project, demanding a careful method to ensure both effectiveness and dependability. It is crucial to discover the subtleties of each step in the process, as they jointly add to the general success of the drywall installment.
Essential Tools for Drywalling
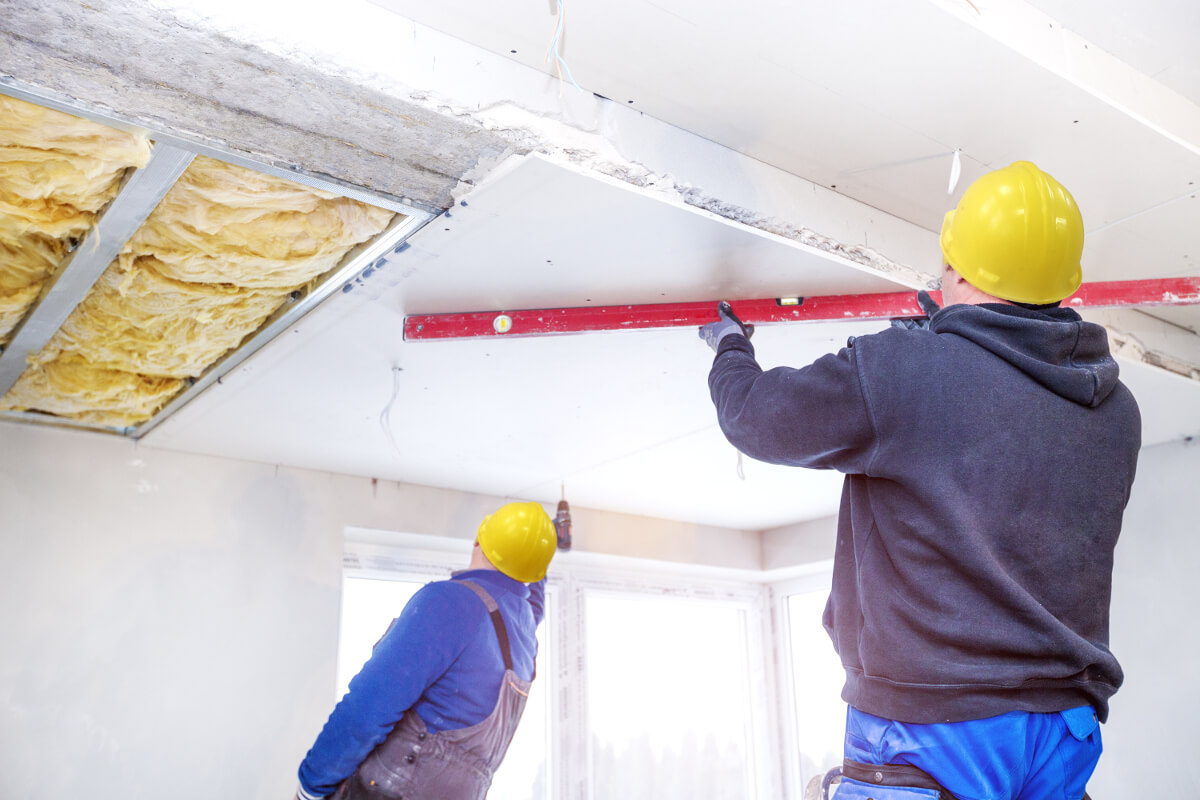
When beginning on a drywall installation project, having the right tools is crucial for attaining a professional finish. Necessary devices consist of a drywall knife, measuring tape, and a T-square, which are fundamental for precise measurements and smooth cuts. A drywall lift is also extremely advantageous, particularly for ceiling setups, enabling for much easier handling of heavy panels.
For fastening the drywall, a cordless drill and drywall screws are necessary. The drill ought to be equipped with a drywall bit to make certain efficiency and accuracy. Additionally, a key tool is the drywall saw, which helps with reducing about electric outlets and various other obstacles.
Additionally, protective gear such as safety glasses and a dust mask are vital to guarantee individual safety and security during the installment procedure. Using the right tools not just enhances the top quality of the setup but additionally simplifies the workflow, making the task a lot more efficient total.
Preparing the Space
Following, analyze the problem of the walls and ceilings. Repair any kind of existing damage, such as openings, splits, or peeling paint, to make certain a smooth and even surface area for drywall application. Furthermore, check for electrical outlets, pipes lines, and heating and cooling ducts, noting their locations to avoid problems during installation.
It is also crucial to determine the room accurately, determining the dimensions of the ceilings and walls to determine the proper quantity of drywall needed. Produce a detailed strategy that includes the layout and additional hints alignment of the drywall panels.
Installation Methods
Effective installation techniques are important for attaining a professional surface in drywall jobs. Proper dimension and cutting of drywall sheets are basic actions.
When hanging drywall, begin with the top and job downward, ensuring that the lengthy edge of the board is vertical to the framing. Safeguard the sheets with screws instead than nails, which supply better holding power and reduce the threat of popping. Location screws every 12 inches along the sides and every 16 inches in the area of the board.
For edges, use corner grains to accomplish sharp, clean sides. When mounting on ceilings, use a drywall lift or have a companion aid in holding the sheets in place (drywall browse around this site fort worth). Maintain a gap of regarding 1/4 inch over the flooring and ceiling to suit growth and contraction
Completing Touches

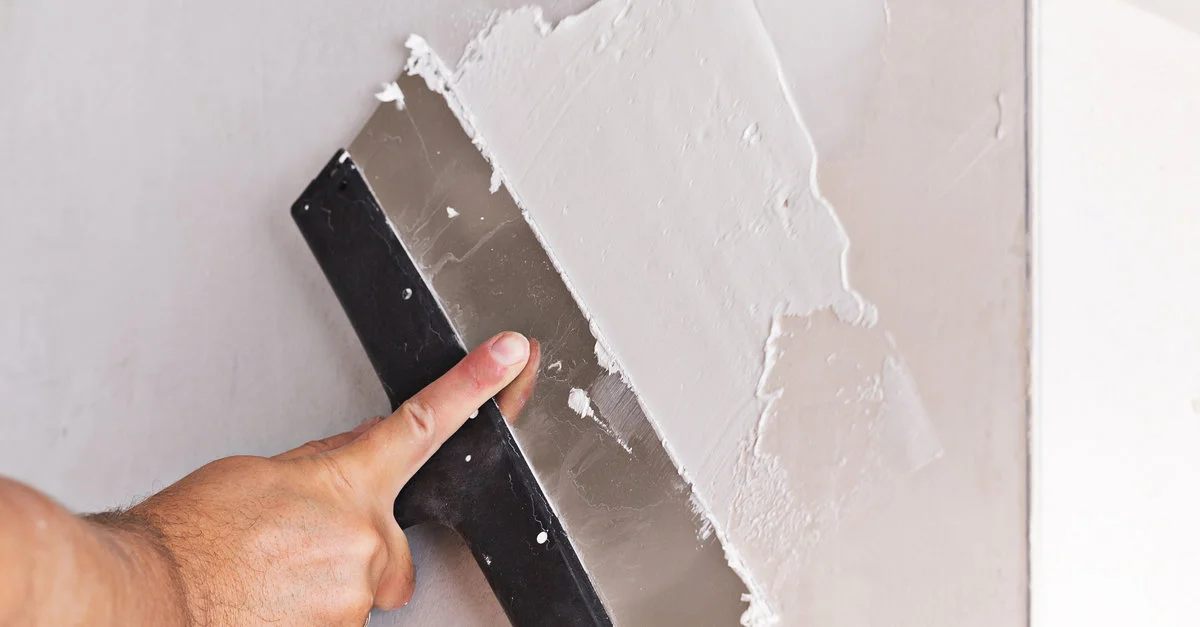
When the tape is in place, it's time to use the initial coat of joint substance, additionally understood as mud. Utilize a 10 to 12-inch taping knife to spread the substance equally over the taped seams, feathering the sides to mix with the surrounding drywall.
Enable the substance to dry thoroughly, generally 24-hour. After drying, sand the surface gently with fine-grit sandpaper to get rid of any kind of flaws. drywall repair. Repeat the mudding and sanding procedure, typically 2 to 3 layers, guaranteeing each layer is smooth and flush with the drywall surface
Usual Blunders to Prevent
Lots of Do it yourself fanatics come across mistakes throughout drywall installation that can compromise the final outcomes. One typical blunder is falling short to appropriately measure and cut drywall sheets.
An additional constant mistake is inappropriate fastening. Making use of also few screws or nails can lead to loose drywall, while overdriving bolts can trigger the paper to tear, weakening the framework. It's critical to preserve constant spacing, typically every 16 inches, and to guarantee that bolts are flush with the surface.
In addition, not addressing dampness concerns before installment can cause mold and mildew growth and structural damages. Constantly evaluate the environment and use moisture-resistant drywall in high-humidity areas.
Final Thought
Effective and reliable drywall setup requires meticulous interest to detail throughout the procedure. Preventing typical mistakes even more contributes to a professional result, underscoring the relevance of precision and method in effective drywall tasks.
It is vital to discover the nuances of each step in the process, as they jointly add to the general success of the drywall installation.When embarking on a drywall installment task, having the right tools is vital for accomplishing an expert finish.For fastening the drywall, a cordless drill and drywall screws are needed.Effectively preparing the room is crucial for check my source a successful drywall installation.Reliable setup methods are crucial for attaining a specialist finish in drywall jobs.